

Table of Contents
ToggleA kitchen island with seating transforms more than just workflow, it becomes the social hub of the home. Whether you’re cooking solo or hosting gatherings, an island with bar seating combines functionality with the gathering space everyone craves. The key is finding a design that fits your kitchen’s layout, your cooking style, and your budget. From sleek modern minimalist approaches to warm farmhouse aesthetics, there’s a seating island suited to nearly every home. This guide walks through seven design directions to help you pick the right solution for your space.
Key Takeaways
- Kitchen island ideas with seating thrive when design matches your layout, cooking habits, and aesthetic—from modern minimalist bar seating to rustic farmhouse styles.
- Standard seat height is 36 inches with a 12-inch overhang; a 4-foot island fits two stools while a 6-foot island comfortably accommodates three.
- Curved and rounded island shapes eliminate sharp corners, encourage face-to-face conversation, and create a more welcoming gathering spot in your kitchen.
- Multi-level islands separate cooking zones from dining zones by using different counter heights (36 inches for prep, 42 inches for bar seating), requiring professional installation for structural integrity.
- Quartz and engineered stone offer low-maintenance durability at $40–$80 per square foot, while natural wood creates warmth but demands annual oiling and trivets to prevent heat damage.
- Small kitchens can still incorporate seating through portable carts, narrow peninsulas, or floating shelves with bar-height brackets rather than full-sized islands.
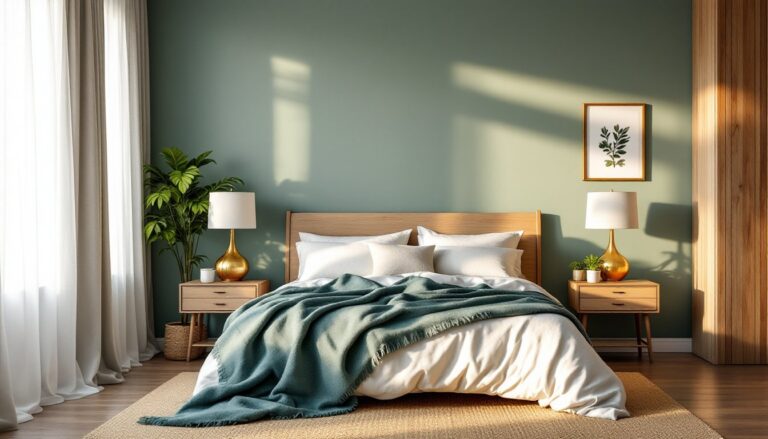
Modern Minimalist Islands With Bar Seating
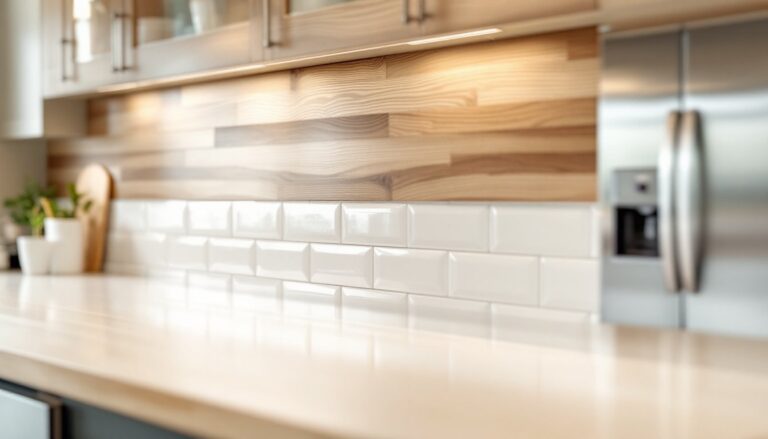
Minimalist island design centers on clean lines, neutral palettes, and smart materials. Think a sleek waterfall edge, where countertop material flows from the top surface down the side face, paired with simple stools tucked underneath. Black, white, or natural wood finishes work well here: avoid ornate detailing or overstuffed cushioning.
Barrier-free seating (stools without backs) keeps sight lines open and maintains the airy feel minimalism demands. Look for stools in matte black metal or natural wood legs with neutral upholstery. A waterfall edge in quartz or honed granite gives a high-end, contemporary look without requiring constant polishing like polished finishes do.
Dimensions matter: a standard 36-inch seat height works for most countertops sitting at 36 inches tall. Leave 12 inches of overhang from the island frame to the seating edge so guests can cross their legs comfortably. If space is tight, a 4-foot island can accommodate two stools: a 6-foot island comfortably fits three.
Installation note: if you’re anchoring bar stools to the island or floor, use lag bolts rated for your stool’s weight plus occupant load. Check local building codes for any seating attachment requirements if the island is built into cabinetry.
Rustic And Farmhouse Island Designs
Farmhouse islands lean on natural wood, chunky legs, and a “lived-in” aesthetic. Reclaimed wood tops, turned legs (sometimes called turned posts), and open shelving below create warmth and practicality. Pair them with upholstered stools in linen, leather, or vintage-look fabric for comfort that invites lingering conversations over morning coffee.
Reclaimed or distressed wood tops develop character over time, though they do require annual oiling or sealing with food-safe finishes like tung oil or beeswax blend. If authentic reclaimed wood is out of budget, solid hardwood tops stained to a medium or dark finish deliver the same vibe at a fraction of the price. Open shelving under the seating area works for storing cookbooks or displaying dishware, but be mindful that dust settles on anything exposed.
Consider a double-sided island if your layout allows it, seating on one side, open shelving for storage or decor on the other. This breaks up visual weight and provides functional workspace on both faces. Rustic farms-style stools with turned legs or those featuring Windsor-style spindle backs complement the aesthetic beautifully and encourage proper posture while dining.
Curved And Rounded Island Shapes
A curved island softens a kitchen’s geometry and creates a more welcoming gathering spot. Instead of a boxy rectangle, imagine a kidney-shaped or oval footprint. The rounded design eliminates sharp corners, a safety plus in busy kitchens, and naturally encourages conversation as diners sit face-to-face rather than in a line.
Curved islands are trickier to build: they require either custom cabinetry or composite materials (engineered materials molded into curves) rather than standard rectilinear framing. If building custom, miter joints and careful measuring are non-negotiable, this isn’t a beginner’s DIY project. Many fabricators and cabinet shops offer curved island options, so pricing a custom unit upfront saves frustration.
Seating naturally follows the curve: three or four stools placed along a 6-8 foot curved edge feel organic rather than forced. A curved edge also reduces the likelihood of someone catching a hip or knee on a corner. Countertop material carries through the curve seamlessly when specified to the fabricator: quartz and solid-surface materials handle curves more forgivingly than natural stone.
Multi-Level Islands With Mixed Seating
A split-level island creates visual interest while separating cooking zones from dining zones. Imagine the working surface (prep countertop) at 36 inches, with a raised bar section at 42 inches on the opposite or adjacent side. This height difference signals “work happens here” and “gather here” without needing words.
Multi-level islands solve a practical problem: stools at bar height (usually 24-30 inches from the floor for a 42-inch countertop) allow full-sized people to sit without bumping knees. Meanwhile, the lower work surface keeps the cook’s ergonomics sound for extended prep work. The step up also visually breaks the island into two functional zones, which appeals especially in open-plan kitchens where the island reads as furniture from the living room side.
Building multi-level requires a solid base structure, often composite cabinetry or built-in units with proper bracing between levels. Joinery and support become critical: improper framing creates wobble or sag over time. Most DIYers should hire a cabinet maker for this: structural integrity isn’t something to experiment with at the island level. Material transitions (where one countertop height meets another) matter too, waterfall edges or contrasting edge banding keep the design intentional and polished.
Space-Saving Solutions For Smaller Kitchens
Not every kitchen has room for a full-sized seated island, but clever design still delivers. A portable cart or butcher-block cart on wheels functions as an island, rolled into place during entertaining, tucked away when not needed. A 24-36 inch wide by 48 inch long cart (roughly) tops out around 150 pounds, so it won’t require structural adjustments to your floor.
Another tactic: a narrow peninsula island (2-3 feet wide, 4-6 feet long) on one wall or end of the kitchen delivers some seating without consuming square footage. Stools tuck underneath, and the prep surface still works. If the peninsula shares a wall with cabinetry or appliances, it’s structurally simpler to build, only one support leg or cantilever from wall-mounted framing.
For truly minimal space, even a thin floating shelf (12-18 inches deep) anchored to wall studs and paired with backless stools creates an eating nook. Use steel bar-height brackets rated for your anticipated load (typically 150 lbs minimum per bracket for eating surfaces). Finish it with a stained wood face or matching countertop material. Small doesn’t mean sacrificing function: it means being deliberate about every inch.
Material Choices And Durability Considerations
Island countertops endure more traffic and wear than most kitchen surfaces. Quartz and engineered stone resist staining, scratching, and sealing requirements, a genuine low-maintenance choice. They cost $40–$80 per square foot installed. Solid-surface materials (like Corian) offer similar benefits and run $30–$60 per square foot but require professional repair if gouged deeply.
Natural stone (granite, marble, slate) looks stunning but demands regular sealing and can stain if liquids sit. Marble is porous and easily etched by acidic foods, beautiful but not practical for heavily used islands. Granite is hardier: slate has rustic appeal but is less scratch-resistant. Budget $60–$150 per square foot for quality natural stone, plus annual or biennial sealing.
Butcher block and wood create warmth and age with character, but they require annual oiling and can warp or split if exposed to extreme humidity changes. Food-safe mineral oil or tung oil is your friend here. Wood also marks from hot pans unless you use trivets, non-negotiable for this material. Sources like Remodelista showcase real-world examples of wood-topped islands thriving in various climates.
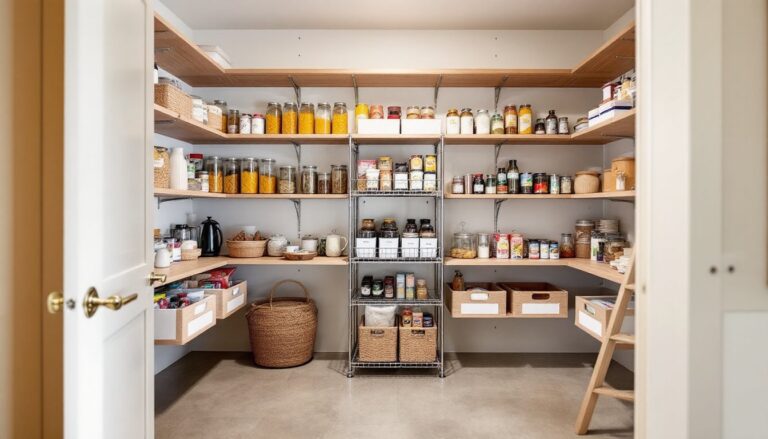
Base cabinetry should resist moisture. Plywood with a quality veneer holds up better than particleboard, which swells if water penetrates the edges. Seal all exposed plywood edges with edge banding or hardwood trim. Shelving, if open, should be finished wood or sealed plywood, MDF (medium-density fiberboard) looks fine initially but deteriorates when exposed to humidity and dust.
Conclusion
A seated island works hardest when its design matches your kitchen’s layout, your cooking habits, and your aesthetic. Sketch your kitchen’s footprint, measure clear working space before and after placement, and verify that seating doesn’t block appliance or cabinet doors. Consult sources like The Kitchn and Homedit for current design inspiration and real-world photos. If the island is load-bearing, anchored to cabinetry, or multi-level, professional installation is worth the investment. Start with measured drawings, confirm materials with vendors, and build or commission thoughtfully. A well-planned seated island pays dividends in daily living and entertaining for years.