
Table of Contents
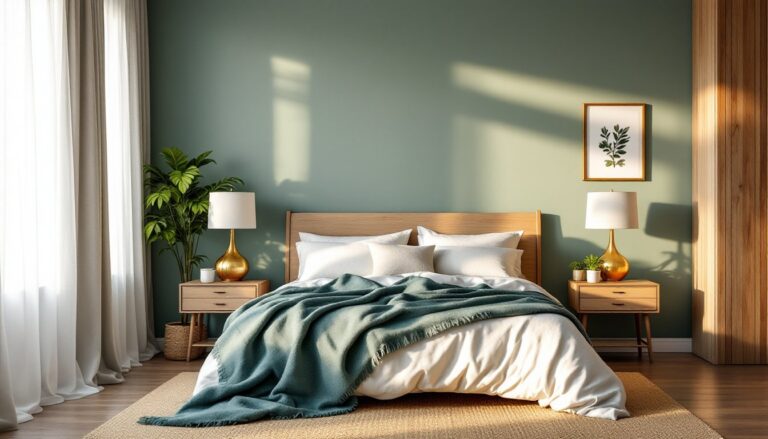
ToggleA built-in TV wall transforms a room from simple seating arrangement into a curated entertainment hub. Unlike a standard wall-mounted television, a thoughtfully designed built-in TV wall integrates storage, accents, and architectural detail around your screen, creating focal points that feel intentional rather than tacked-on. Whether you’re starting a renovation or refreshing a tired living room, the right built-in TV wall design can anchor your space and add real functionality. This guide walks you through nine modern approaches, from floating consoles to floor-to-ceiling paneling, so you can pick a strategy that fits your layout, skill level, and style.
Key Takeaways
- A built-in TV wall transforms a room into a curated entertainment hub by integrating storage, accents, and architectural detail that feels intentional rather than tacked-on.
- Floating media consoles paired with open shelving offer a budget-friendly ($200–$600) and quick upgrade that keeps cable management tidy while forcing selective, clutter-free styling.
- Floor-to-ceiling wall paneling—using wood slats, shiplap, or stone veneer—creates architectural depth and custom-built aesthetics that elevate the entire space.
- Recessed shelving maximizes storage without visual bulk but requires careful assessment of wall structure, utilities, and potentially professional framing ($50–$100/hour) to avoid safety hazards.
- Pairing a fireplace with your built-in TV wall creates a warm, functional centerpiece when you maintain proper clearance (12+ inches above fireplace, 18+ inches from heat) and balance both focal points visually.
- Success in built-in TV wall projects relies on prep work, stud location, utility inspection, and finishing details rather than design—measure twice and don’t rush surface preparation.
Floating Media Console With Open Shelving
A floating media console offers clean lines and intentional simplicity. Mount a 3/4-inch plywood platform (or engineered hardwood) on heavy-duty shelf brackets rated for 75+ lbs each, positioned 12–18 inches below your mounted TV. This height keeps cable management tidy and prevents the console from competing visually with the screen.
Pair the console with open shelving above or beside it, typically 10–12 inches of vertical space per shelf. Open shelving forces you to be selective about decor (think books, speakers, framed family photos), avoiding the cluttered look that closed cabinetry invites. Stagger shelves at 14–16 inches apart for visual rhythm.
Materials list:
- 3/4-inch plywood or hardwood edge-banded board (size varies by wall width)
- Floating shelf brackets (minimum 75-lb weight rating per bracket: use at least two per shelf)
- 2.5-inch wood screws (for securing brackets into studs)
- Wood stain, paint, or finish of choice
- Cable management raceway or clips
Key steps:
- Locate and mark studs 16 or 24 inches on center using a stud finder.
- Drill pilot holes into studs, then secure brackets with 2.5-inch wood screws.
- Measure and cut your shelving material to fit snugly between brackets.
- Sand any rough edges, then apply finish (stain or paint).
- Install shelves level, using a 4-foot level to confirm.
- Run cable through conduit behind or beneath the console to hide wires.
This approach works well if your wall is already painted and you want a quick upgrade. It’s also budget-friendly compared to full wall treatments. Floating consoles typically cost $200–$600 in materials, depending on wood quality and bracket style.
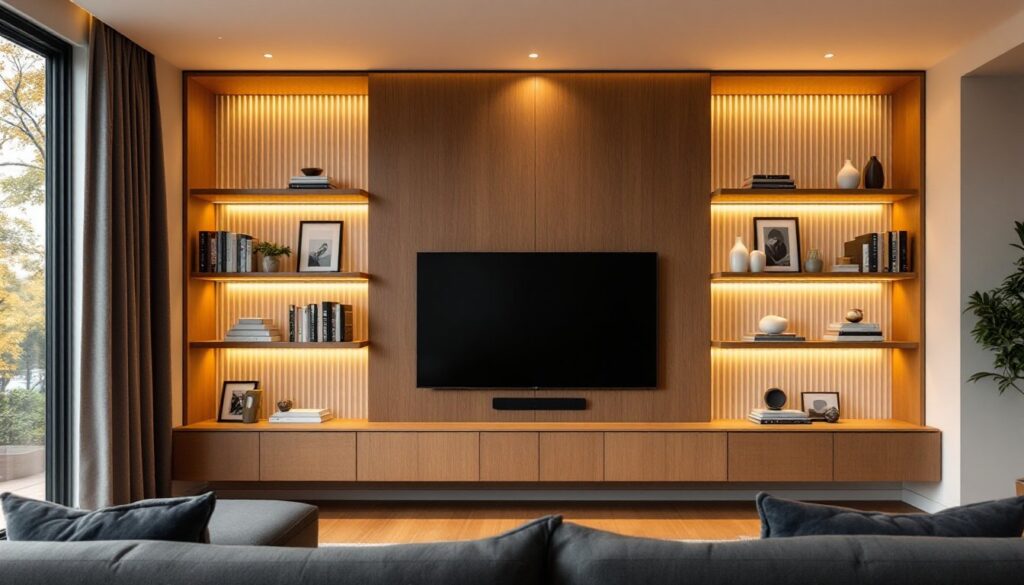
Floor-to-Ceiling Wall Paneling and Accent Features
Paneling your entire wall, from baseboard to ceiling, creates architectural depth and a custom-built feel. This approach transforms a plain drywall surface into a statement piece and pairs beautifully with built-in lighting and recessed niches.
Wood Slat and Shiplap Designs
Wood slat walls use thin, vertical boards (typically 1×4 or 1×6 nominal lumber, which measures 3.5 or 5.5 inches wide) installed over a furring strip base. Shiplap, boards with rabbeted edges that overlap, offers a similar aesthetic but hides fasteners for a seamless finish.
Why choose wood slats? They’re forgiving for DIYers, add warmth, and work with modern or farmhouse styles. The horizontal grain lines draw the eye and make spaces feel wider.
Installation approach:
- Install horizontal 2×4 furring strips 16 inches on center, secured to studs with 2.5-inch screws.
- Cut slats to length, accounting for any ceiling trim or baseboard.
- Attach slats vertically using a nail gun with 1.5-inch brad nails or finish nails, placing two fasteners per board at each furring strip.
- Sand, prime, and paint (or stain) for a unified look.
Materials estimate: $150–$400 for a 10×10 foot wall, depending on wood grade and finish.
Shiplap follows the same principle but requires more precision in cut angles. If you’re not comfortable with a miter saw or table saw, consider pre-cut shiplap boards from big-box retailers, they cost more but save hours.
Pro tip: Acclimate wood to your home’s humidity for 48 hours before installation. Wood expands and contracts with moisture: rushing this step causes warping and gaps.
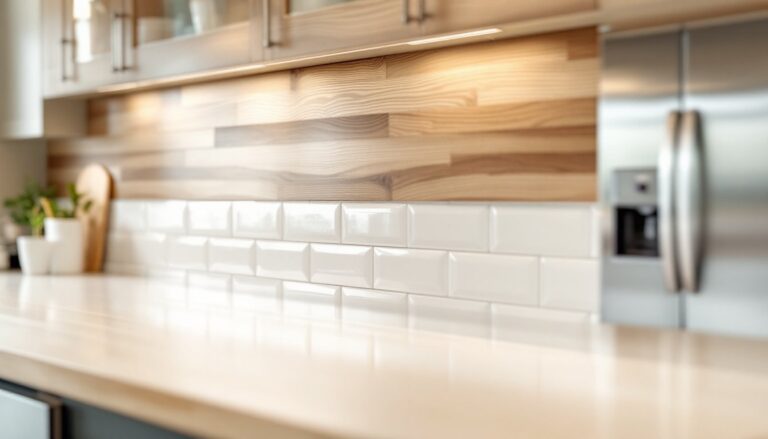
Stone and Tile Accent Walls
Stone or tile creates a premium look and handles heat near a fireplace or beneath direct lighting. Stacked stone veneer (engineered stone) is lighter and easier to install than real stone: 3×6 subway tile offers clean modernism: large-format porcelain tiles (24×48 inches) deliver contemporary elegance with fewer grout lines.
Installation checklist:
- Ensure your wall is structurally sound: stone and tile are heavy.
- Use a notched trowel (10×10 mm for smaller tiles, larger for big formats) to apply thin-set mortar.
- Butter the back of each piece, then press firmly, using tile spacers to maintain consistent gaps.
- Grout after the mortar cures (usually 24–48 hours).
- Seal grout if using lighter colors to prevent staining.
When to hire a pro: If your wall is uneven, requires structural reinforcement, or you’re working with natural stone, call a tile specialist. Labor costs $8–$15 per square foot: material ranges from $4–$20+ per sq. ft. depending on the product.
Tile and stone reflect light beautifully, pair them with recessed downlights or LED strips above the TV for dramatic effect. Recent interior design inspiration sources showcase how these materials ground high-end builds.
Recessed Shelving and Hidden Storage Solutions
Recessed shelving sits flush with your wall, removing clutter from the room visually while maximizing storage. This is a structural project, you’re cutting into studs and the wall cavity, so assess your wall carefully before starting.
Pre-project checks:
- Use a stud finder and drywall saw to confirm there are no hidden pipes or electrical lines.
- If your wall is load-bearing (exterior wall or above/below another level), consult local building codes or a structural engineer before cutting studs.
- Interior walls are usually non-load-bearing, making them safer for recessed shelving.
Basic recessed shelving approach:
- Mark out shelf locations using a pencil and level.
- Cut drywall along your marks with a drywall saw, exposing studs.
- Install a 2×4 header and sill (horizontal framing members) at top and bottom of the opening if you’re removing studs entirely: if studs remain flanking the opening, secure the header and sill to them with 2.5-inch screws.
- Frame the interior with 2×4 studs 16 inches on center.
- Install shelving brackets or a 3/4-inch plywood shelf on cleats (small ledger boards screwed to the interior framing).
- Close the opening with 1/2-inch drywall, tape, mud, sand, and paint.
Hidden storage within the wall cavity adds function without visual bulk. Some DIYers build pull-out drawers (using full-extension ball-bearing slides) inside the recess for AV equipment, controllers, or extra remotes.
Reality check: This is a moderate-to-advanced project. If you’re uncomfortable removing drywall, relocating electrical outlets, or assessing wall structure, hire a professional framer ($50–$100/hour labor). Mistakes, especially near electrical or plumbing, create safety hazards and costly repairs.
Material costs: $100–$300 per shelf unit in framing, drywall, and finish materials, plus labor if contracted.
Fireplace and TV Wall Combinations
Pairing a fireplace with a built-in TV creates a warm, functional centerpiece. The challenge is balancing both focal points, the TV shouldn’t dwarf the fireplace, and the fireplace shouldn’t create excessive heat near your TV and electronics.
Layout strategy: Stack the TV above the fireplace if your ceiling is high enough (ideally 10+ feet), or flank them side by side if the wall is wide. Side-by-side layouts often feel less forced and allow both features to command attention independently.
Clearance and safety:
- Maintain at least 12 inches of clearance above a wood-burning fireplace (check your specific model’s specs).
- Keep electronics 18+ inches from active fireplace heat to prevent thermal stress on components.
- Install a mantel (8–12 inches deep) above the fireplace opening: this provides visual separation and a perch for decor.
- Use fireproof drywall or cement board behind and around the fireplace opening for code compliance.
Combining materials: Frame fireplace surrounds with 3/4-inch hardwood trim, match it to shelving or paneling flanking the TV, and unify the wall with coordinating paint or stain. The fireplace surround is a natural focal point: resist over-decorating the TV wall.
Why this works: Best TV wall mounting solutions showcase combinations that anchor living rooms. A fireplace + TV wall gives you gathering warmth and entertainment in one spot, reducing the need for furniture to sprawl across the room.
Permit note: Most jurisdictions require permits for fireplace installation or modification, whether you’re building a new surround or replacing an old unit. Check with your local building department before starting. If you’re modifying an existing fireplace, hire a certified chimney sweep or fireplace professional, damage to the flue or firebox creates serious safety risks.
Conclusion
Built-in TV walls blend function, storage, and style into a single investment. Whether you choose a simple floating console, dramatic floor-to-ceiling paneling, or a statement fireplace combination, the key is honest assessment of your skill, space, and timeline. Start with prep work, measure twice, locate studs and utilities, gather proper tools, and don’t rush finishes. Most successful DIY builds fail due to skipped surface prep or finishing details, not design flaws. Pick one of these approaches, gather your materials, and transform your TV from a black box on the wall into a thoughtfully integrated centerpiece.