


Table of Contents
ToggleYour kitchen island does more than provide counter space, it’s a focal point that anchors the room’s entire aesthetic. The back panel, often overlooked, is where you can inject personality and practicality without a major overhaul. Whether you’re updating a tired galley kitchen or finishing a fresh renovation, the right back panel design elevates function and visual interest. This guide walks through material options, design ideas, and installation steps to help you choose what fits your space and skill level.
Key Takeaways
- A kitchen island back panel protects walls from splashes, creates visual separation, and hides plumbing and electrical runs while elevating the room’s aesthetic.
- Material choices range from shiplap and reclaimed wood ($1–$15 per board foot) to durable tile, stone, and brick—each offering different cost, durability, and design appeal.
- Bold paint colors, two-tone designs, and removable wallpaper offer low-cost, high-impact kitchen island back panel ideas without requiring permanent installation.
- Proper substrate preparation, moisture barriers, and correct fastening techniques are critical to prevent wood rot, tile failure, and sagging in your kitchen island back panel project.
- For visible applications above 4 feet or structural modifications, hire a professional; DIY success depends on assessing your wall type, locating studs, and using appropriate tools for your chosen material.
Why Your Kitchen Island Needs a Back Panel
A back panel serves multiple purposes. It protects your wall from cooking splashes and stains, creates visual separation between the island and cabinetry behind it, and establishes a defined architectural boundary in an open-concept kitchen. Without one, your island reads as an orphaned counter: with one, it becomes a finished, intentional feature.
Back panels also hide plumbing, electrical runs, and the sometimes-messy underside of countertops. They give you a chance to tie together color palettes or introduce an accent that keeps the eye moving through the space. The panel doesn’t need to be elaborate, sometimes a simple paint treatment or matte finish works better than busier materials.
Modern Back Panel Materials and Finishes
Shiplap and Reclaimed Wood Options
Shiplap has moved past farmhouse cliché into genuine utility. The overlapping boards create shadow lines that catch light and add texture without visual clutter. True shiplap (beveled boards that interlock) costs more than tongue-and-groove alternatives, but the finished look justifies it for visible applications.
Reclaimed wood brings authenticity and warmth that new material struggles to match. A weathered barn board or salvaged hardwood back panel tells a story and anchors rustic or transitional kitchens. Expect to pay a premium, reclaimed wood runs $8–$15 per board foot versus $1–$3 for new pine shiplap. Seal or finish reclaimed wood with a food-safe, matte polyurethane to protect against moisture and staining.
New wood painted or stained also works. Tongue-and-groove planks (nominal 1×6 or 1×8) are easier to install than true shiplap and give similar visual impact at lower cost. Acclimate wood to your kitchen’s humidity for a week before installation to prevent cupping or gaps later.
Tile, Stone, and Brick Designs
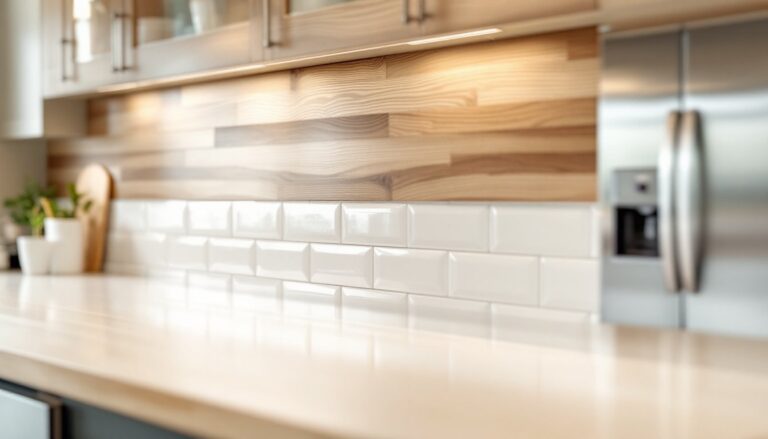
Tile offers durability and endless pattern options. Subway tile remains popular because it’s timeless, easy to clean, and forgiving to install. Lay it in a running bond (offset rows) or herringbone pattern for more visual interest. Grout color matters, light grout visually lightens a small space: dark grout adds contrast and hides spots in active kitchens.
Larger format tiles (12×24 or 18×36 inches) create a modern, minimal look with fewer grout lines. They’re trickier to install, you’ll need proper substrate, spacers, and patience, but the sleek result appeals to contemporary aesthetics. Stone and brick designs range from tumbled marble to stacked slate to faux brick. Real stone stains and etches: use sealant appropriate to the stone type (ask at the tile supplier). Faux brick panels, made from resin or thin veneer, weigh less and install faster than real masonry but won’t develop the aged patina over time.
Creative Design Ideas for Visual Impact
Color and Paint Techniques
Don’t underestimate paint. A bold color, deep navy, sage green, or charcoal, turns the island into a statement piece. Pair it with light cabinetry and countertops to prevent the space from feeling cramped. Matte or eggshell finishes hide imperfections better than gloss, which reflects cooking light and steam.
Two-tone designs work too: paint the lower half one color and add shiplap, tile, or wallpaper above. This breaks up vertical space and feels intentional. Stripes, geometric patterns, or even a small-scale mural add personality without overwhelming the room. The Kitchn showcases kitchen designs that prove subtle color choices often outperform trendy, complex patterns.
For a low-commitment approach, removable wallpaper creates pattern and texture. Quality peel-and-stick options stick reliably to clean, smooth surfaces. Avoid them on uneven plaster or rough brick, they won’t adhere properly. If you rent or aren’t ready to commit, wallpaper gives all the visual impact without permanence. Paint-grade beadboard (cheap, lightweight panels with a classic groove pattern) primes and paints quickly and costs under $20 per sheet. Stain it dark for contrast or paint it white for a cottage feel.
Installation Tips and Practical Considerations
Start by assessing your existing wall. Is it plaster, drywall, or concrete? Plaster and concrete require different fastener strategies. Use a stud finder to locate framing, anchoring into solid wood studs ensures the panel won’t sag. Mark studs with pencil at 16-inch intervals (standard spacing) before you begin.
For shiplap or wood panels, install a moisture barrier (felt paper or house wrap) first. This prevents water from wicking behind the boards if splashes occur. Moisture behind wood is the fastest path to mold and rot. Secure the barrier with small nails or staples, then install boards using a nail gun or screws. Pre-drill screw holes to prevent splits, especially near board edges. Stagger seams and stagger fasteners so no line of nails runs continuously, this prevents the wood from splitting as it expands and contracts.
Tile requires a solid, stable substrate. Drywall works, but cement board or tile backer board is safer around kitchen moisture. Screw backer board to studs (not glue), then apply thinset mortar with a notched trowel (size matches tile dimensions, check the tile manufacturer’s spec). Press tiles firmly, use spacers for even grout joints, and let mortar cure fully (usually 24 hours) before grouting. Curated kitchen island backsplash selections demonstrate that proper substrate prep separates professional results from amateur failures.
For paint, prep the wall like any cabinet paint job: wash with TSP (trisodium phosphate), sand glossy surfaces, fill holes, and prime. Two coats of cabinet-grade paint (semi-gloss or satin) resist moisture better than interior latex. Use a roller for even coverage and a brush for edges and details.
Tools you’ll likely need: stud finder, level, nail gun or drill-driver, circular saw or miter saw (if cutting wood), notched trowel (for tile), grout float, and safety gear, goggles, dust mask, and work gloves are non-negotiable, especially when cutting tile or handling adhesives. If the back panel extends above 4 feet or requires any structural changes to the island itself, hire a pro. Know your limits: mistakes here are visible daily and costly to fix.