

Table of Contents
ToggleKitchen cabinets set the stage for everything that happens in your cooking space, workflow, storage, and daily efficiency all hinge on how you arrange them. Whether you’re renovating an entire kitchen or reworking your current layout, the right cabinet configuration can transform how you move, store, and function. This guide walks you through seven proven kitchen cabinet layout ideas, from efficient galley designs to spacious U-shaped arrangements. You’ll learn which layouts work best for different room sizes, how to maximize your workflow, and practical tips for getting the most storage out of your square footage.
Key Takeaways
- Kitchen cabinet layout ideas fundamentally determine your cooking workflow, storage efficiency, and daily movement patterns, so choosing the right design before renovating is critical to long-term functionality.
- Galley kitchen cabinet layouts maximize storage in narrow spaces by using parallel runs with a 3–5 foot walkway, keeping the work triangle compact and everything within arm’s reach.
- L-shaped and U-shaped cabinet configurations are versatile options that work in most room sizes, with U-shaped designs offering maximum storage when you have at least 7–10 feet of depth.
- Islands and peninsulas add prep space and style to kitchen cabinet layouts, but require proper clearance (at least 3 feet) and careful planning for plumbing and ventilation if appliances are included.
- Mixed cabinet solutions combining open shelving with closed cabinetry create visual airiness while hiding less-attractive items, though open shelves require disciplined organization and secure installation on wall studs.
- Prioritize workflow and practical storage over design trends when selecting your kitchen cabinet layout, ensuring daily-use items stay within reach and the work triangle stays efficient.
Galley Kitchen Cabinets: Efficient Storage for Narrow Spaces
A galley kitchen runs two parallel cabinet runs with a walkway between them, picture the galley on a ship, which is where the name comes from. It’s the go-to for narrow rooms, townhouses, and apartments where square footage is tight. Both walls work hard, so you get solid storage and counter space without eating into the middle of the room.
The main advantage is the work triangle (stove, sink, fridge) stays compact. Everything is within arm’s reach, which speeds up cooking and cleanup. You typically get one run of upper and lower cabinets on each side, often with a window above the counter on one wall.
For a standard galley, allow 3 feet minimum between the two cabinet runs for comfortable movement, ideally 4 to 5 feet if space allows. Wider walkways reduce that cramped feeling. Shallow base cabinets (18 inches deep instead of the standard 24) can shave a foot off the walkway width without sacrificing much storage.
Galley layouts work best when the galley runs the length of the room, not across its width. If you’ve got a short, wide space, the galley won’t help, you’ll end up with an awkward traffic flow. Lighting matters too: galley kitchens can feel dark if you rely on cabinets blocking natural light. Underscore lighting under uppers and good task lighting above counters is worth the effort.
L-Shaped Cabinet Layouts: The Versatile Workhorse Design
L-shaped layouts are the most common cabinet arrangement in residential kitchens, and for good reason: they work in almost any room footprint and handle the work triangle elegantly. Cabinets run along two adjacent walls, leaving one wall open for eating, a window, or a doorway.
You typically get an upper and lower run on each wall. The corner is where things get interesting, corner cabinets can be a classic dead zone (wasted space in the back) or, with modern hardware, highly functional. Lazy Susan inserts, pull-out carousels, and diagonal corner cabinets make those 24-inch corner spaces actually usable instead of just a spot where things disappear.
The L-shape gives you flexibility in appliance placement. You might tuck the fridge at one end, the stove along one wall, and the sink at the corner or on the second wall. The work triangle stays reasonable, and you’ve got a clear separation between the kitchen and the rest of the home.
One tip: if you have an L-shaped kitchen with a window on one wall, avoid putting your sink directly under it unless you like backlit spray. Orient your layout to position the sink where you get side or overhead light instead. Also, plan your corner cabinet strategy early, replacing it later is expensive, so get it right the first time.
U-Shaped Cabinet Configurations: Maximum Storage and Workflow
U-shaped kitchens wrap cabinets around three walls, creating the ultimate closed-loop workflow. Everything, prep, cooking, and cleanup, happens in a contained loop. If you’ve got the square footage, this layout delivers maximum storage and minimal wasted steps.
The work triangle sits snugly inside the U, so you move efficiently between sink, stove, and fridge without crossing your own path. Most U-shaped kitchens feature a counter run on three walls with uppers and lowers on two sides and sometimes just a lower or upper on the third, depending on window placement and door locations.
U-shaped layouts need at least 7 feet of depth (across the bottom of the U) to avoid feeling claustrophobic and to ensure two people can work without bumping elbows. Ideally, aim for 8 to 10 feet. The distance between the two parallel sides should be at least 4 feet, narrower than that and you’re back to a tight, awkward space.
Corner cabinets are even more critical in a U-shape because you’ve got two of them and both will affect your workflow. Invest in quality corner solutions here: a poorly designed corner can kill the whole layout’s efficiency. One more consideration: a U-shape can feel closed-in in smaller homes, so plan your lighting, color, and upper cabinet placement to keep the space open visually.
Island and Peninsula Cabinet Designs: Adding Function and Style
Kitchen Island Layouts for Added Prep Space
An island adds workspace, seating, and storage to the center of your kitchen. It’s the showpiece that can completely change how your kitchen feels and functions. Islands work best in kitchens that are at least 12 feet by 12 feet, though that’s not a hard rule, smaller islands (3 feet by 3 feet) fit tighter spaces.
Islands typically include a lower cabinet run (24 inches deep) on one or both sides, sometimes with an overhang for seating on one face. Overhead, you might hang a pot rack, pendant lights, or leave it open for sight lines. The island breaks up the galley or L-shaped run and creates a focal point.
Work triangle planning changes with an island. Your sink, stove, or cooktop might migrate to the island itself, or the island becomes pure prep and storage. If you put a cooktop or sink in the island, plan for plumbing and ventilation before cabinet installation, running supply lines and vents inside an island is expensive but doable with proper planning.
A peninsula is the island’s cousin, it’s a single-sided cabinet run that juts out from one wall, creating a partial separation between the kitchen and dining area. Peninsulas are perfect for open-concept homes where you want to define the kitchen zone without fully closing it off. They’re easier to plumb and vent than islands because they tie to an existing wall.
Both islands and peninsulas eat floor space, so make sure your kitchen traffic flow still works. You need at least 3 feet of clearance on all sides of an island to avoid a bottleneck. In tight kitchens, a peninsula might be smarter than a full island.
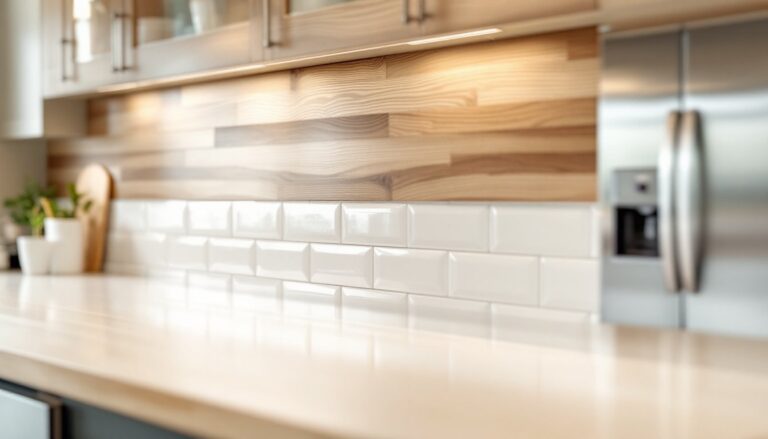
Open Shelving and Mixed Cabinet Solutions: Modern Storage Flexibility
Open shelving has made a comeback in modern kitchens, but it’s not a free pass to ditch cabinetry. Smart designs mix open shelves with closed cabinets, open shelving for frequently used dishes and ingredients, cabinets for less-attractive items and small appliances.
Open shelves are cheaper to install (no cabinet boxes or doors) and create visual airiness, but they show dust and clutter quickly. You need disciplined organization and attractive dishware to make them work. A solid rule: if an item looks good on display, it goes on open shelving: if you’d rather hide it, it gets a cabinet.
Mixed solutions often feature uppers that combine shelves and cabinets, maybe three shelves on one side, two cabinet doors on the other. Lower cabinets stay fully closed since that’s where you store heavier items, small appliances, and less photogenic stuff. This approach gives you flexibility: if you change your mind in a year, you can add doors to shelves or remove them later.
Sources like The Kitchn and Remodelista showcase countless examples of mixed cabinet layouts that balance style with function. Open shelving also makes your kitchen feel bigger because sightlines aren’t blocked by cabinet doors, a huge plus in smaller homes.
One caution: if you have young kids or pets, open shelving might mean more breakage and mess. Closed cabinets contain chaos better. Also, open shelves require solid structural backing (wall studs on 16-inch centers), you can’t just screw shelves into drywall and expect them to hold dishes safely. Install floating shelves on proper shelf brackets bolted into studs.
Conclusion
Your kitchen cabinet layout is the skeleton of your kitchen’s functionality. Start by measuring your space, sketching your work triangle, and being honest about how you actually cook and store food. The best layout isn’t always the fanciest, it’s the one that lets you move efficiently and keeps the things you use daily within reach. Whether you go galley, L-shaped, U-shaped, or add an island, prioritize workflow and storage over trends, and you’ll have a kitchen that works for years to come.