


Table of Contents
ToggleA small shower doesn’t mean settling for a cramped, uninspiring space. The right tile choice can completely transform even the tiniest bathroom into a retreat that feels open, bright, and intentional. Small shower tile ideas aren’t just about picking something that fits the footprint, they’re about using color, layout, texture, and pattern to manipulate how the space feels. Whether you’re working with a 3-by-5-foot stall or a corner wedge that barely fits a person, strategic tile selection combined with smart layout techniques can make the difference between a utility space and a sanctuary. This guide walks through practical, proven tile approaches that maximize visual space, enhance lighting, and create visual interest without overwhelming compact dimensions.
Key Takeaways
- Light colors and glossy finishes in small shower tile ideas reflect light and create a sense of openness without making the space feel cramped or claustrophobic.
- Vertical tile layouts and stacked patterns visually pull the eye upward, making ceilings feel taller and walls less confined in compact bathroom spaces.
- Larger tile formats (12-by-24 inches or 12-by-12 inches) with thin grout joints minimize visual chopping and create a seamless, more spacious appearance.
- Textured tiles like terrazzo or matte finishes add visual depth and luxury without busy patterns, while specialty options like glass tile catch light for a spa-like feel.
- Full-height floor-to-ceiling tile installation unifies the space, improves moisture resistance, and eliminates visual breaks that fragment small shower areas.
- Porcelain and glazed ceramic with proper waterproofing and epoxy grout ensure durability and mildew resistance in high-moisture shower environments.
Why Tile Choice Matters for Small Shower Spaces
Tile isn’t just a surface in a small shower, it’s the primary visual anchor of the entire space. In compact bathrooms, walls dominate the visual field, so every tile decision ripples through the perception of size, light, and style.
Small showers benefit most from tiles that reflect light, create visual continuity, and avoid heavy patterns that can feel claustrophobic. Glossy finishes bounce light around, making the space feel airier. Larger tiles reduce visual grout lines, which minimizes chopping up the walls into busy segments. Neutral colors and monochromatic schemes create a sense of flow and openness.
Tile also affects moisture management and maintenance. In a small, often-steamy shower, porcelain and glazed ceramic resist mildew better than porous materials. The layout, whether you run tiles vertically, horizontally, or in a herringbone, also influences how the eye moves through the space and whether the shower reads as taller or wider.
Material choices and installation methods matter too. A substrate like cement board (not drywall) is essential in a wet environment, and proper waterproofing prevents costly mold or rot behind walls. Most small showers need tile of at least ¼-inch thickness for durability, and grout selection, epoxy vs. cement, affects both appearance and longevity in high-moisture zones.
Light Colors and Minimalist Patterns for Visual Expansion
Light tile colors are the fastest way to make a small shower feel larger. White, cream, soft gray, and pale blue all reflect available light and create a sense of openness without feeling sterile if layered with texture or subtle pattern.
The logic is straightforward: dark colors absorb light and make walls feel closer. Light colors push walls back visually, especially in a shower where you’re standing inches from the surround. A light palette also gives you flexibility to add warmth through fixtures, lighting, or a single accent wall without overwhelming the space.
Minimalist patterns, think thin pinstripes, very subtle geometric prints, or soft hexagons, add interest without creating visual noise. Avoid busy florals, large-scale paisleys, or high-contrast patterns in small showers unless you’re using them on a single accent strip, not the entire enclosure.
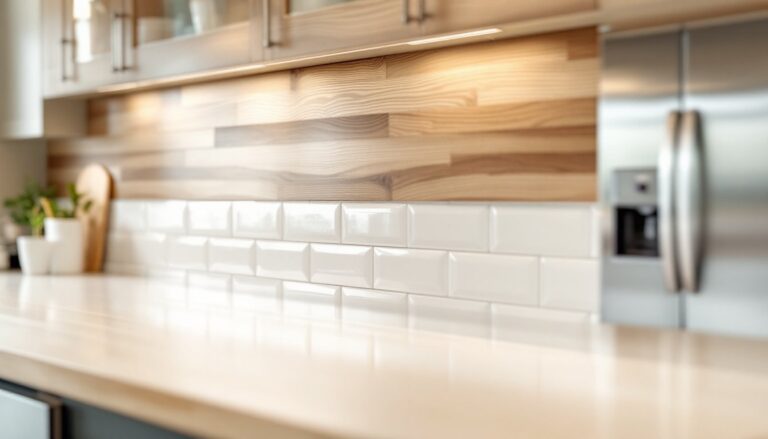
White and Neutral Tile Palettes
All-white or off-white tile creates a gallery-like backdrop. Choose a satin or matte finish (not too glossy) to avoid a clinical look. Pair it with dark grout lines for definition, or use a white grout to create seamless flow. Porcelain in a 12-by-24-inch or 12-by-12-inch format works well: fewer seams mean a cleaner visual impression.
Neutral palettes, soft grays, taupes, or warm creams, offer more flexibility if you want to shift decor later. These colors also hide soap residue and water spots better than pure white, a practical consideration in a household with hard water.
Vertical Tiling Techniques That Maximize Height
The eye naturally follows vertical lines, and in a small shower, this is a tool. Running tile vertically or laying it in a “stacked” pattern (where tiles align directly above one another, rather than in offset brick-bond) visually pulls the eye upward, making ceilings feel taller and walls feel less cramped.
Shiplaptrack or subway tile laid vertically emphasizes height. Tall, narrow tiles (like 4-by-12-inch or 3-by-12-inch formats) are especially effective. Running them floor-to-ceiling, rather than leaving a border at the top, continues that upward visual momentum without interruption.
Vertical grout lines also matter. A layout with prominent vertical grout lines reads taller than one with horizontal emphasis. In contrast, horizontal stripes and layouts can make a shower feel wider, useful if the space is very tall and narrow, though less common in residential bathrooms.
For walls, a full-height tile treatment (from floor to ceiling) unifies the space and feels more intentional than a partial height surround. It’s also easier to clean and more resistant to moisture damage. If budget is tight, consider full-height tile on the back wall (where the eye settles when standing in the shower) and three-quarter height on side walls, keeping the visual emphasis on height.
Textured and Specialty Tile Options
Texture adds visual depth and interest without requiring color or pattern. Matte finishes, rustic tiles with slightly uneven surfaces, and embossed or dimensional tiles all create tactile interest and catch light differently than smooth glossy surfaces.
Terrazo tile (flecked stone aggregate cast in resin or cement) has gained popularity in small bathrooms because flecks catch light and create visual complexity on a relatively neutral background. It reads luxurious without a fussy pattern, and warm, modern bathroom renovations.
Small format tiles, like 2-by-2-inch mosaics or 1-by-1-inch penny rounds, create texture and visual interest. The trade-off is more grout lines, which can make a small space feel busier. Save small-format tiles for an accent, perhaps one feature wall or a niched shelf, rather than the entire shower.
Natural stone (marble, slate) looks sophisticated but is porous and requires sealing. Porcelain that mimics stone offers the look with better durability and moisture resistance. Wood-look tile adds warmth without the mold risk of actual wood in a wet shower.
Glass tile, either as solid panels or mixed with ceramic, reflects light and feels contemporary. It requires extra care during installation to avoid chipping and shows water spots more visibly than opaque tiles, but in the right layout, especially in a small space where it catches morning light, glass can feel elegant and spa-like.
Grout and Layout Strategies for Small Bathrooms
Grout color and width are subtler but powerful design levers. Thin grout joints (⅛-inch or even less with precise installation) visually expand the tile surface and reduce visual chopping. Wider joints (¼-inch or more) are easier to clean and work well with textured tile but can make a small space feel fragmented.
Dark grout (charcoal, black, slate) on light tile creates contrast and definition, making each tile read individually, useful if tiles are textured or varied but can emphasize grout lines in a way that makes the space feel smaller. Light-colored grout (white, cream) or grout matching the tile creates visual flow and makes the surround feel seamless, ideal for small spaces.
Epoxy grout is more durable and stain-resistant than standard cement grout, especially valuable in a shower where moisture and cleaning chemicals are constant. It’s harder to install (requires skill and careful mixing), so budget for professional installation if you’re not experienced.
Layout matters as much as the tile itself. Offset brick-bond patterns are visually complex and should be used sparingly in small bathrooms. Linear, stacked layouts are cleaner and faster to install. A herringbone pattern (45-degree angled tiles) adds visual interest without feeling busy, though it requires more cuts and skilled installation.
Floor-to-ceiling tile eliminates visual breaks and anchors the space. If you’re mixing two tile types (for example, larger format on walls, mosaics on an accent strip), keep the larger format dominant and the accent subtle. Exploring multiple design approaches, and renovation planning tools can.
For very small showers, avoid dramatic changes in tile size or direction mid-wall. Consistency in format and layout reads calmer and makes the space feel less chopped up.
Conclusion
Small shower tile ideas hinge on three principles: maximizing light, maintaining visual continuity, and choosing durable, moisture-resistant materials. Light colors, vertical layouts, quality porcelain, and thin grout joints work together to create a space that feels larger and more polished than its actual square footage. Whether you prefer minimalist white subway tile or textured terrazzo accents, the key is choosing materials and layouts that unify rather than fragment the space. With thoughtful planning and proper waterproofing, even the tiniest shower can become a highlight of the home.